Today I want tell you about what I have been working on lately: my first amigurumi pattern! Yes, that’s right. I created a crochet pattern all on my own and I still can’t believe it! Probably you have seen some pictures on Instagram or Facebook.
What I usually do: Take my hook, take some yarn from my stash and start playing with different stitches and forms and after trying different things, I end up with cute amigurumi dolls.
I never written down what I have done, so it is quite tricky to get the same result when try to do the same thing again.
The
writing
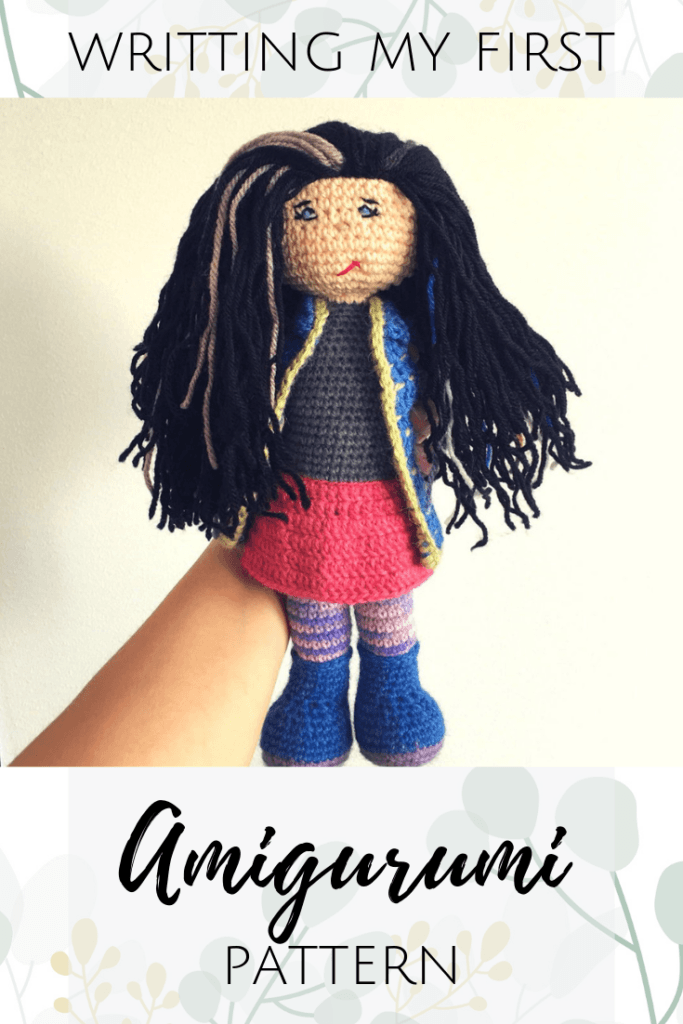
Some weeks ago I was starting with a new project and decided I would write down every step to see if I could recreate it. So, with pencil and paper on the side, my hook and yarn on hands and a silly TV show on the screen, my sweet Josefin doll was being born.
It took a lot longer than expected and a lot of trial and error, but the result was so cute. Don’t you think?
While working on the pattern, I had to go back a few stitches (sometimes a lot of stitches ?) in order to get the result I wanted.
It took me a lot of days to write the first draft, mainly because I only have the nights to crochet but also because i needed to write down every single thing I was doing… how to start, where to change colors, counting the stitches in every round, counting rounds, etc.

Besides, you can’t just sit and forget everything and everyone around you (sometimes you wish you could ha ha ha!). You may have to leave your work aside to do other things and when you come back, guess what? You probably already forgot which round or stitch you were working on!
It was then when I realized I needed something to keep track of the stitches and rounds. I learned the hard way, counting and counting several times, just to be sure I got it right).
There are some useful tools you can use when you need to stop and not worry much about losing the count. See my post Top 10 Must have Crochet tools to learn more about essential crochet supplies that will save you lots of time and headaches.
The materials
and technique
I used 100% alpaca yarn and 3,5 mm hook for the body, 100% cotton yarn for the head and some leftover yarn from old projects for her hair.
Head and body were stuffed with OEKO-TEX standard 100 polyester. Her eyes, nose and smile were embroidered by hand using sewing thread.
I used very basic stitches, the body and the head were done using single crochet and working in rounds without sl st at the end of the round. Jacket and skirt were done using double crochet and working in rows.

new products release, exclusive discounts and awesome giveaways!
The
Test
The idea of writing the pattern was to be able to recreate it, so I did three more dolls, two girls and a boy, using different hooks and different yarns to see if pattern worked.
For the second doll, I reduce the number of rounds in the body and did the eyes a bit different using safety eyes and felt.

For the boy, I used acrylic yarn and not alpaca, mainly because my son wanted those colors. I noticed the the spaces between stitches is bigger compared to the other dolls, probably I should have used a smaller hook. Here a picture of him before sewing his arms.

While making these new dolls, I found some errors and did some modifications to the original pattern. So, for the third doll, I used baby alpaca yarn again and used a smaller hook (2,5mm).
I also changed the arms, in the first dolls I attached the arms to the body using a thread needle but in this last doll I crocheted the arms directly from the body.
Another change I did was the way I joined both legs, so in the original pattern I joined the legs without adding any extra chain between them. In this last doll, I did add some extra chains to give more space between the legs. You can see the difference here:

and the
Result…
I’m happy with the final doll and will publish pictures of the last doll and final pattern soon, so you can make your own Josefin doll too. Stay around!
Have you ever written your own amigurumi pattern? Tell me all about it, it will be great to hear you experience! Leave a comment below.
got Pinterest?
just pin it!
Wow, the pictures are so cute. You have done a nice job. I had no idea that you can make these cute dolls with yarn. Your article has been an eye opener for me. My mother loves crochet and knitting. I remember when I was a kid; she would knit and crochet clothing for me. But she has never made a doll. I am so excited to share this article with her. I beg she is going to make one of these dolls for her grandson soon. Thank you so much for putting this together. It was a fun read and I learned a lot. Looking forward to your next post. Thank you.
Thank you! I’m sure your mother will do it in no time and her grandson will be super happy!!!
I have to say I have never heard of this before. But the dolls are great, and the work that goes in it is very fascinating. How old were you when you got really interested in this?
Thanks! I started when I was a little girl, but stop for many years. I started again a couple of years ago and couldn’t believe I remembered how to do it and it is so fun!!!